Front Cross Carry is one of my favorite woven wrap carries. First, it can be completely pre-tied and your baby can be easily popped in and out of the wrap as many times as needed. This is awesome especially for babies or toddlers who like to be up and down. Second, it ties in the front. This is wonderful because you can easily pre-tie the carry, hop in your car and drive, and then get out and pop in baby. While you're driving, you don't have an uncomfortable knot in your back. It's also really comfortable to sit down in if baby falls asleep or you are lucky enough to have a baby who likes to be wrapped while you sit. Third, this is an awesome winter or rainy day carry. You can tie before you leave the house and you have no tails dragging on wet pavement. You can also easily pre-tie the carry and put on your coat over it. When you get where you are going, you can just pop baby into the wrap, adjust, and zip your coat over both of you to stay warm. This photo-tutorial will walk you through the steps of the carry. If you prefer video format, click here for a YouTube video of the exact same thing.
Part 1: Setting up the carry
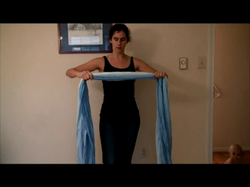
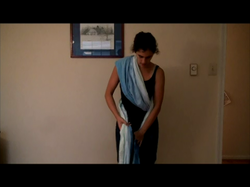
Find the middle marker of your wrap. Bunch your wrap neatly.
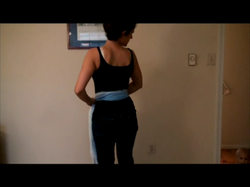
Place the center marker at the middle of your lower back.
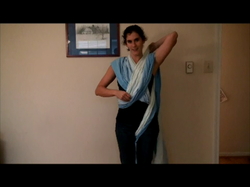
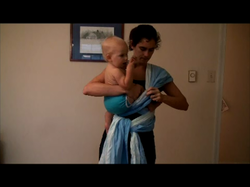
Take one tail and pin it between your knees to hold it still. Take the other tail up and over the opposite shoulder.
I find that the secret to getting this carry close to perfectly adjusted before putting in the baby is to take a moment at this step and do two things.
1. give the top edge of the wrap (the light blue shown in the picture) a bit more slack.
2. Take out a little slack from the bottom edge of the wrap (darker blue in the picture).
1. give the top edge of the wrap (the light blue shown in the picture) a bit more slack.
2. Take out a little slack from the bottom edge of the wrap (darker blue in the picture).

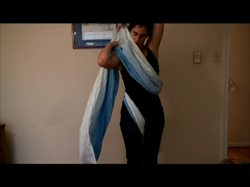
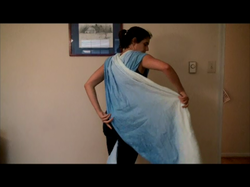
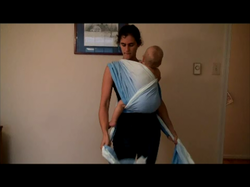
Behind you, bring the tail across your back in a diagonal and under the opposite arm. Spread it neatly and wide across your back for your comfort.
Pin the tail you just worked with between your knees and grab the other tail that you have been holding there.
Repeat the steps you just did with the other tail. First, bring the tail up and over the opposite shoulder. Take a moment to add a little slack to the top edge of the wrap and take out a little slack from the bottom edge of the wrap.
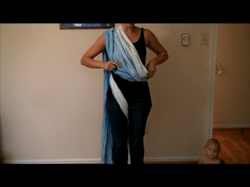
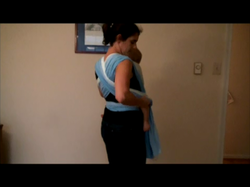
Bring this tail diagonally across your back and under the opposite arm. Spread the tail wide and neatly across your back.
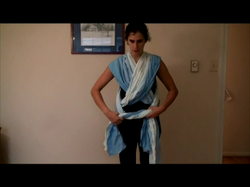
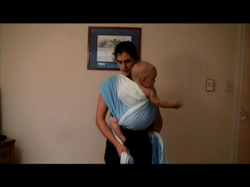
Tie a loose half knot in front. You will make this a double knot later after you put in baby and do final adjustments.
Part 2: Popping the Baby into the Carry

First, make a little slack for the baby. Place your hands inside of the two cross passes, and pull straight down. This takes the slack from the center back piece and shoulder pieces and brings it to the front to give room for adding the baby.

Then pick up your baby and put him/her on your hip. Reach inside of the cross pass that is underneath (the first one you made) and use your hand to guide baby's leg through the cross pass.

Bring baby's leg through the first cross pass.
Repeat with the other leg. Now baby should be sitting on the two cross passes. Baby's knees should be slightly higher with his/her bottom.

Spread the cross pass that you made first (whichever one is underneath) from knee to knee on your baby and up across your baby's back. Make sure that the fabric extends all the way from one knee to the other on baby.

Repeat with the second cross pass. Spread it from one knee on baby all the way to the other knee and up across baby's back. Baby should be fully supported from knee to knee and across the back by both of these cross passes.
Step 3: Adjusting the Carry
At this point, you will most likely need to adjust. If you look at the picture above, you can see that the darker blue part of the wrap is kind of loose and the lighter blue part is really tight. Uneven tightness can cause strain or digging for either you or baby. Take a moment to adjust. First, untie the loose half-knot that you made.
Take out any excess slack that you feel by feeding it up toward your shoulder in the front and across your back. It is easiest to keep one hand under baby and lift up baby's weight while bouncing slightly and pulling out the slack that you feel. Take out slack from the top edge, middle of the wrap, and the bottom edge of the wrap. Do this on both sides.
When you feel it is nicely adjusted and the extra slack is gone, retie. Take both tails under your baby's legs and tie a double knot under baby's bottom.
Part 4: Taking Baby out of the Wrap

Pull the top cross pass down.

Pull the bottom cross pass down. Then simply lift baby out of the wrap.
 RSS Feed
