Once you know all of the types of passes that are used in wrap carries, you can easily learn new carries. Visit our Wrap Pass Glossary to learn all of the pass types. Here we will show you how the passes are combined to create many common carries.
Cross Carries: Carries composed mostly of cross passes
Cross carries are excellent for babies who like to straighten their legs. However, they do not provide as much protection against leaning as other carries, particularly cross carries that do not have any other pass types. If the carry includes a horizontal pass, there is a little more protection against leaning. Front carries that have only cross passes are "poppable" which means you can easily pre-tie the carry and pop baby in and out of the carry as needed without untying.
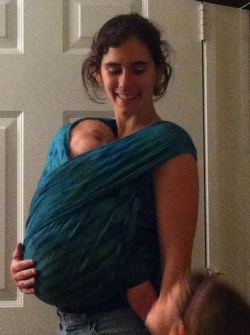
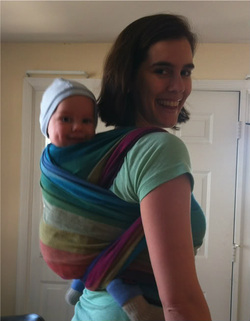
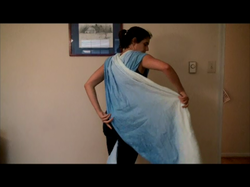
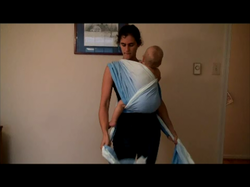
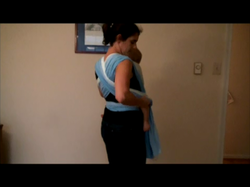
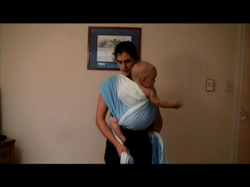
Front Wrap Cross Carry (FWCC)
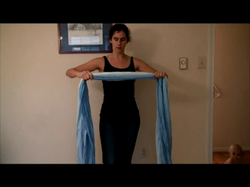
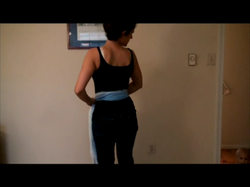
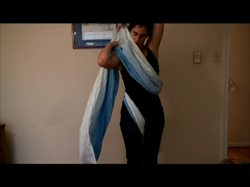
1. Horizontal pass.
2. Cross tails in the back and bring over shoulders.
3. Cross Pass
4. Cross Pass
5. Tie in back.
1. Horizontal pass.
2. Cross tails in the back and bring over shoulders.
3. Cross Pass
4. Cross Pass
5. Tie in back.
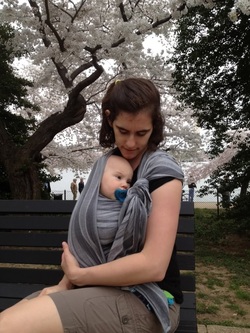
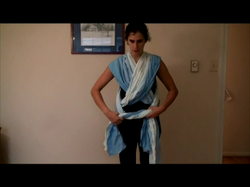
Half Front Wrap Cross Carry (Half-FWCC)
1. Horizontal Pass
2. Cross fabric in back.
3. Cross Pass.
4. Tie at shoulder.
1. Horizontal Pass
2. Cross fabric in back.
3. Cross Pass.
4. Tie at shoulder.

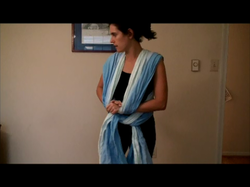
Hip Wrap Cross Carry (HWCC)
1. Horizontal Pass
2. Cross Pass
3. Cross Pass.
4. Tie at opposite hip.
* Shown with bunched cross passes. The passes can be either bunched or spread.
1. Horizontal Pass
2. Cross Pass
3. Cross Pass.
4. Tie at opposite hip.
* Shown with bunched cross passes. The passes can be either bunched or spread.

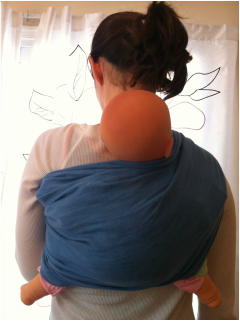
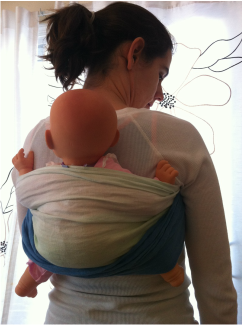
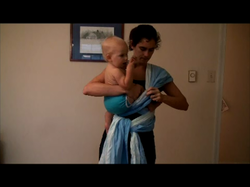
Back Wrap Cross Carry (BWCC)
1. Horizontal Pass.
2. Tie a half knot at the chest to secure the first pass.
3. Shoulder flip, then cross pass.
4. Shoulder flip, then cross pass.
5. Tie in front.
* Shown tied at the chest (or "tied Tibetan") due to baby belly!
1. Horizontal Pass.
2. Tie a half knot at the chest to secure the first pass.
3. Shoulder flip, then cross pass.
4. Shoulder flip, then cross pass.
5. Tie in front.
* Shown tied at the chest (or "tied Tibetan") due to baby belly!
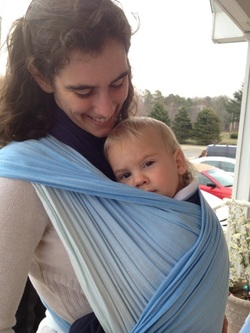
Front Cross Carry (FCC)
1. Bunched horizontal pass across wearer's lower back.
2. Cross Pass
3. Cross Pass
4. Cross tails in back
5. Tie in front.
* The image shows the carry with the shoulder capped to keep the wrap away from baby's face. To cap the shoulder, just take the top rail and pull it toward the edge of your shoulder.

Coolest Hip Cross Carry (CHCC)
1. Cross pass.
2. Cross Pass.
3. Tie at shoulder
1. Cross pass.
2. Cross Pass.
3. Tie at shoulder
Hip Cross Carry (HCC)
1. Start center of wrap at shoulder.
2. Cross pass to opposite hip.
3. Cross pass to opposite hip.
4. Tie on the other side.
Back Cross Carry (BCC)
1. Cross Pass
2. Cross Pass
3. Tie at shoulder
1. Start center of wrap at shoulder.
2. Cross pass to opposite hip.
3. Cross pass to opposite hip.
4. Tie on the other side.
Back Cross Carry (BCC)
1. Cross Pass
2. Cross Pass
3. Tie at shoulder

Short Cross Carry (SCC)
1. Start wrap dangling at the center of your back.
2. Cross Pass
3. Cross Pass
4. Thread wrap through dangling piece.
5. Tie at hip.
1. Start wrap dangling at the center of your back.
2. Cross Pass
3. Cross Pass
4. Thread wrap through dangling piece.
5. Tie at hip.
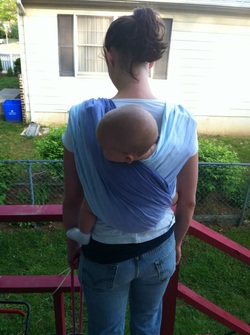
Kangaroo Carries: Carries that start with a Ruck/Kangaroo Pass
Kangaroo carries tend to be the airiest of the carries for summer because there is a little ventilation on the sides for baby. When used for back carries, these ruck carries are excellent for babies who like to see what's going on because they can easily be tied high enough for baby to see over the wearer's shoulder.

Kangaroo
With a short wrap:
1. Ruck/Kangaroo Pass
2. Cross wrap fabric in back.
3. Tie in front.
With a longer wrap:
1. Ruck/Kangaroo pass.
2. Cross wrap fabric in back.
3. Bunched cross pass.
4. Bunched cross pass.
5. Tie in back.
With a short wrap:
1. Ruck/Kangaroo Pass
2. Cross wrap fabric in back.
3. Tie in front.
With a longer wrap:
1. Ruck/Kangaroo pass.
2. Cross wrap fabric in back.
3. Bunched cross pass.
4. Bunched cross pass.
5. Tie in back.
Reinforced Kangaroo
1. Ruck/Kangaroo Pass
2. Cross wrap fabric in back.
3. Reinforcing pass.
4. Reinforcing pass.
5. Tie in back.
1. Ruck/Kangaroo Pass
2. Cross wrap fabric in back.
3. Reinforcing pass.
4. Reinforcing pass.
5. Tie in back.
Ruck Tied in Front (RTIF)
1. Ruck/Kangaroo pass.
2. Bunched cross pass.
3. Bunched cross pass.
4. Tie in front.
1. Ruck/Kangaroo pass.
2. Bunched cross pass.
3. Bunched cross pass.
4. Tie in front.

Reinforced Ruck (RR)
1. Ruck pass.
2. Reinforcing cross pass.
3. Reinforcing cross pass
4. Tie in front.
1. Ruck pass.
2. Reinforcing cross pass.
3. Reinforcing cross pass
4. Tie in front.
Reinforced Rear Rebozo Ruck (RRRR)
This one is confusing because it has rebozo in the name, but actually does not have a rebozo pass! This carry is also known as "Pirate Carry," because of it's abbreviation RRRR.
1. Ruck pass.
2. Horizontal pass.
3. Tie at the shoulder.
This one is confusing because it has rebozo in the name, but actually does not have a rebozo pass! This carry is also known as "Pirate Carry," because of it's abbreviation RRRR.
1. Ruck pass.
2. Horizontal pass.
3. Tie at the shoulder.
Rebozo Carries: Carries that are composed mostly of rebozo passes
Rebozo carries provide excellent protection against leaning.

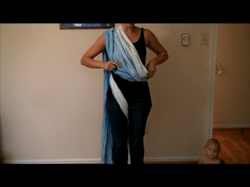
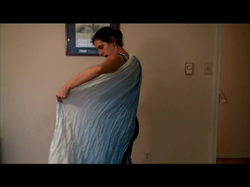
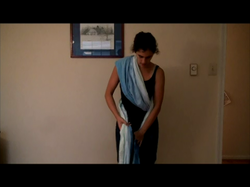
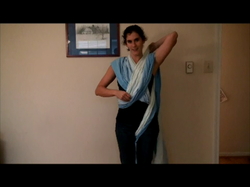
Rebozo
1. Rebozo Pass
2. Tie at shoulder
1. Rebozo Pass
2. Tie at shoulder
Double Rebozo (DR)
1. Rebozo Pass
2. Shoulder flip, then Rebozo Pass.
3. Tie at the shoulder.
1. Rebozo Pass
2. Shoulder flip, then Rebozo Pass.
3. Tie at the shoulder.
Double Hammock (DH)
1. Rebozo pass.
2. Torso/horizontal pass over wearer's chest.
3. Rebozo Pass.
4. Bunched Cross Pass
5. Bunched Cross Pass
6. Tie in front.
1. Rebozo pass.
2. Torso/horizontal pass over wearer's chest.
3. Rebozo Pass.
4. Bunched Cross Pass
5. Bunched Cross Pass
6. Tie in front.

Double Hammock Rebozo (DHR)
1. Rebozo Pass.
2. Torso/Horizontal pass over wearer's chest.
3. Rebozo Pass
4. Tie at shoulder.
1. Rebozo Pass.
2. Torso/Horizontal pass over wearer's chest.
3. Rebozo Pass
4. Tie at shoulder.
Double Rebozo with a Shoulder to Shoulder chestbelt (DRS2S)
1. Rebozo Pass
2. Create chestbelt in front
3. Shoulder flip and Rebozo pass
4. Thread tail through chestbelt.
5. Bunched Cross Pass
6. Bunched Cross Pass
7. Tie in front.
1. Rebozo Pass
2. Create chestbelt in front
3. Shoulder flip and Rebozo pass
4. Thread tail through chestbelt.
5. Bunched Cross Pass
6. Bunched Cross Pass
7. Tie in front.
Mixed Pass Carries: These carries combine two or three pass types
Mixed Pass Carries tend to be excellent with wiggly babies or toddlers. These carries typically combine passes that protect against leaning (Kangaroo/ruck or Rebozo Passes) with passes that protect against leg straightening (cross passes, reinforced cross passes, and bunched cross passes)
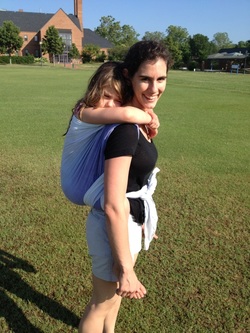
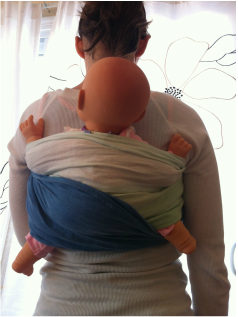
Giselle's Back Carry (GBC)
1. Rebozo Pass.
2. Shoulder flip, then cross pass.
3. Reinforcing cross pass.
4. Tie in front.
* Not the best picture. This was my first try with GBC. In this image I did a rebozo pass, reinforcing cross pass, and then cross pass. (So basically I switched the order of the last two passes).
1. Rebozo Pass.
2. Shoulder flip, then cross pass.
3. Reinforcing cross pass.
4. Tie in front.
* Not the best picture. This was my first try with GBC. In this image I did a rebozo pass, reinforcing cross pass, and then cross pass. (So basically I switched the order of the last two passes).
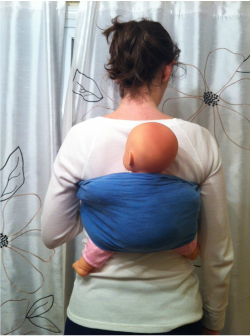
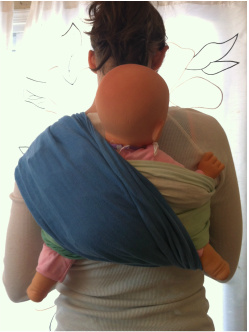
Jordan's Back Carry (JBC)
1. Rebozo pass
2. Shoulder flip, then cross pass.
3. Horizontal pass.
4. Tie in front.
* There are other versions of Jordan's Back Carry, but this is the most common one. Another popular version of JBC has two rebozo passes followed by a horizontal pass and is usually called "Jordan's Back Carry with Two Rebozo Passes."

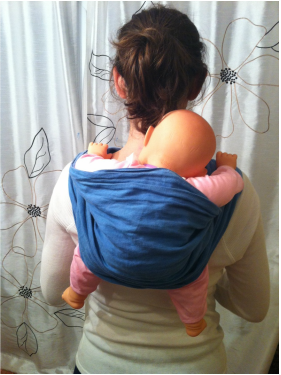
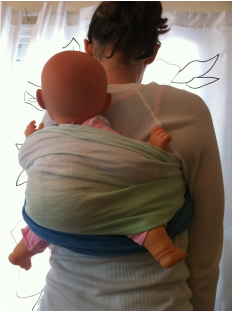
Half Jordan's Back Carry (Half-JBC)
1. Rebozo Pass.
2. Shoulder flip, then cross pass.
3. Tie at shoulder
* There are other versions of Half Jordan's Back Carry. The original version had a cross pass, shoulder flip, and then rebozo pass.
1. Rebozo Pass.
2. Shoulder flip, then cross pass.
3. Tie at shoulder
* There are other versions of Half Jordan's Back Carry. The original version had a cross pass, shoulder flip, and then rebozo pass.
Secure High Back Carry (SHBC)
1. Rebozo Pass
2. Tie a half knot at chest to secure the first pass.
3. Bunched cross pass.
4. Shoulder flip, then cross pass or rebozo pass, depending on the carry variation.
1. Rebozo Pass
2. Tie a half knot at chest to secure the first pass.
3. Bunched cross pass.
4. Shoulder flip, then cross pass or rebozo pass, depending on the carry variation.


 RSS Feed
