by Jennah Watters, ABE
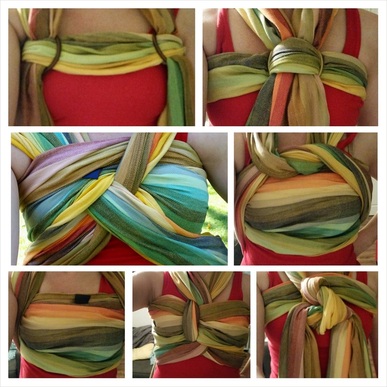
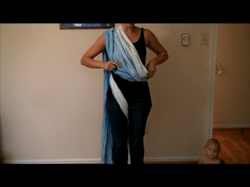
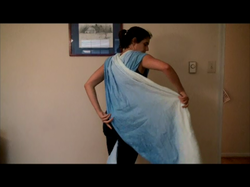
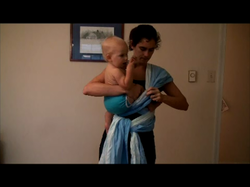
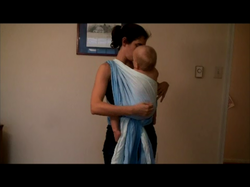
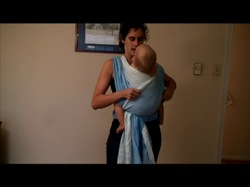
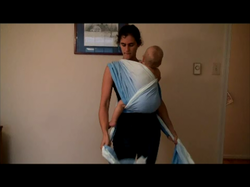
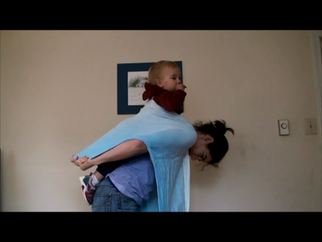
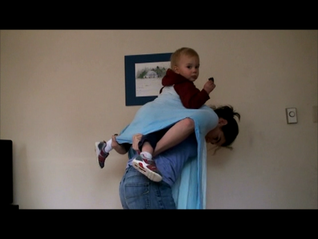
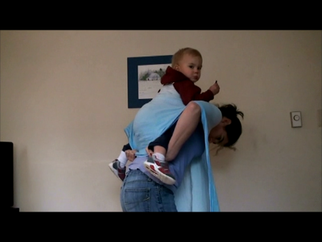
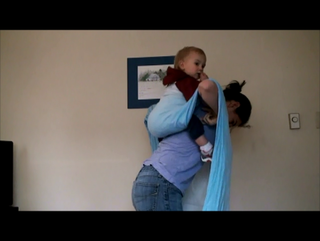
Double Hammock (DH) is one of the more popular back carries, and one of the first "fancy carries" I wanted to lea. It's a very supportive multi-layer carry that is great for larger babies or toddlers. There are also a ton of ways to make it even fancier, which is super fun for things like babywearing photo shoots. I actually prefer some of these alternate tie-offs for comfort, too, as regular ruck (backpack)-style straps tend to slide off my shoulders. Check the video for instructions, and the photos below for a round-up with a few additional tip and tricks.
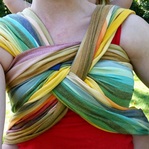
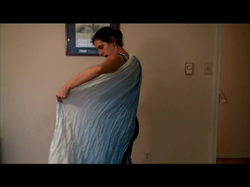
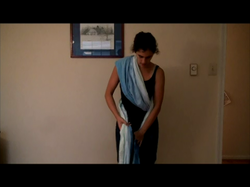
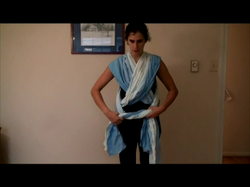
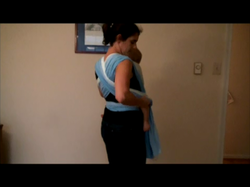
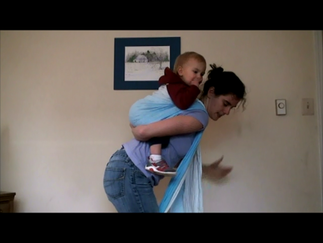
Regular DH, tied in front
Generally a base size carry (so, the size you can do FWCC in). Some of these are also "shorty" carries and can be done with a wrap as small as a 2, depending on your size and baby's size. These can also be done with one less than your base size, and tied under baby's butt rather than bringing back around front. The trick to getting a good DH (for me) is to focus on getting the top rail nice and tight as you bring it around. You can tighten the rest "strand by strand" once you've gotten it around baby's back.
Double Hammock (DH) is one of the more popular back carries, and one of the first "fancy carries" I wanted to lea. It's a very supportive multi-layer carry that is great for larger babies or toddlers. There are also a ton of ways to make it even fancier, which is super fun for things like babywearing photo shoots. I actually prefer some of these alternate tie-offs for comfort, too, as regular ruck (backpack)-style straps tend to slide off my shoulders. Check the video for instructions, and the photos below for a round-up with a few additional tip and tricks.
Regular DH, tied in front
Generally a base size carry (so, the size you can do FWCC in). Some of these are also "shorty" carries and can be done with a wrap as small as a 2, depending on your size and baby's size. These can also be done with one less than your base size, and tied under baby's butt rather than bringing back around front. The trick to getting a good DH (for me) is to focus on getting the top rail nice and tight as you bring it around. You can tighten the rest "strand by strand" once you've gotten it around baby's back.
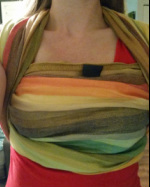
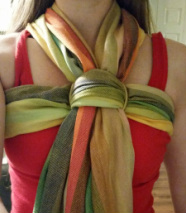
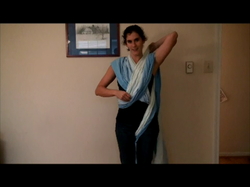
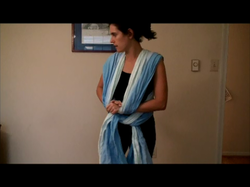
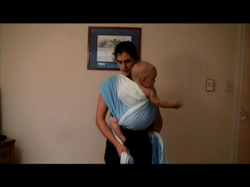
DH with a knot
Base size. I actually forgot to put this one in the video above! But, after you have the 2 straps over your shoulders, all you do is tie a regular old half knot (which is just a fancy name for regular knot) above your chest, then continue the carry by bringing the straps under your arms, and either tie under baby's butt or bring back around to tie in front. Shoulders can be capped.
Base size. I actually forgot to put this one in the video above! But, after you have the 2 straps over your shoulders, all you do is tie a regular old half knot (which is just a fancy name for regular knot) above your chest, then continue the carry by bringing the straps under your arms, and either tie under baby's butt or bring back around to tie in front. Shoulders can be capped.
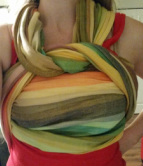
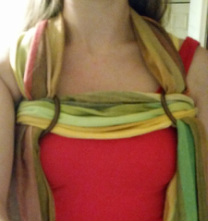
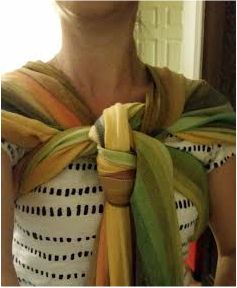
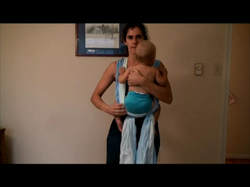
DH Saltwater
Base size. Very comfortable and pretty photo shoot carry! This one is not as complicated as it looks, and imitates the twist in popular Saltwater sandals. Shoulders can be capped.
Base size. Very comfortable and pretty photo shoot carry! This one is not as complicated as it looks, and imitates the twist in popular Saltwater sandals. Shoulders can be capped.
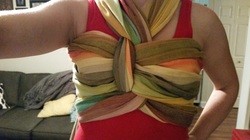
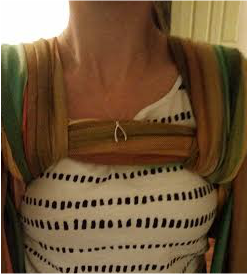
DH Freshwater
Base size. This is my favorite base size DH variation. It's pretty like Saltwater, but comes up less high on your neck, which is great for comfort and also if you want to show off a necklace or something. Same as Saltwater, but with one less cross. Shoulders can be capped
Base size. This is my favorite base size DH variation. It's pretty like Saltwater, but comes up less high on your neck, which is great for comfort and also if you want to show off a necklace or something. Same as Saltwater, but with one less cross. Shoulders can be capped
DH with a single ring
Shorty carry, done with a 2, 3, or 4 and a single L sling sing (from slingrings.com). This is my favorite of the ring variation shorty carries. Shoulders can be capped, and chest can also be spread for comfort if you prefer. Ring carries are great because you can do lots of fine adjustments after you are already "finished" with the carry. For all DH-variation shorty carries, keep in mind that they may not be good for seat poppers, since there is no X under baby's bum to keep them in place, should they pop their seat.
Shorty carry, done with a 2, 3, or 4 and a single L sling sing (from slingrings.com). This is my favorite of the ring variation shorty carries. Shoulders can be capped, and chest can also be spread for comfort if you prefer. Ring carries are great because you can do lots of fine adjustments after you are already "finished" with the carry. For all DH-variation shorty carries, keep in mind that they may not be good for seat poppers, since there is no X under baby's bum to keep them in place, should they pop their seat.
DHDR (DH double rings)
Similar to the single ring finish, but you use 2 M (or possible 2 S, for thing wraps) sling rings. Most people find this most comfy when worn above the chest, with both rings pulled toward the armpits. Ring carries are great because you can do lots of fine adjustments after you are already "finished" with the carry. For all DH-variation shorty carries, keep in mind that they may not be good for seat poppers, since there is no X under baby's bum to keep them in place, should they pop their seat.
Similar to the single ring finish, but you use 2 M (or possible 2 S, for thing wraps) sling rings. Most people find this most comfy when worn above the chest, with both rings pulled toward the armpits. Ring carries are great because you can do lots of fine adjustments after you are already "finished" with the carry. For all DH-variation shorty carries, keep in mind that they may not be good for seat poppers, since there is no X under baby's bum to keep them in place, should they pop their seat.
DH knotless
Shorty carry. This finishes the same way Double Rebozo Shoulder to Shoulder (DRS2S) does, and is a great shorty option if you have no rings. Again, most comfortable with the knotless thingies pulled toward the armpits. Shoulders can be capped. be sure that you go OVER then UNDER rather than vice versa, otherwise it will not stay tight without a knot! Think that the tail should come out UNDER the wrap and toward your armpits. Though it's not as easy as with rings, you can also do some tightening and adjusting after you are done with the carry with a knotless finish like this. For all DH-variation shorty carries, keep in mind that they may not be good for seat poppers, since there is no X under baby's bum to keep them in place, should they pop their seat.
Shorty carry. This finishes the same way Double Rebozo Shoulder to Shoulder (DRS2S) does, and is a great shorty option if you have no rings. Again, most comfortable with the knotless thingies pulled toward the armpits. Shoulders can be capped. be sure that you go OVER then UNDER rather than vice versa, otherwise it will not stay tight without a knot! Think that the tail should come out UNDER the wrap and toward your armpits. Though it's not as easy as with rings, you can also do some tightening and adjusting after you are done with the carry with a knotless finish like this. For all DH-variation shorty carries, keep in mind that they may not be good for seat poppers, since there is no X under baby's bum to keep them in place, should they pop their seat.
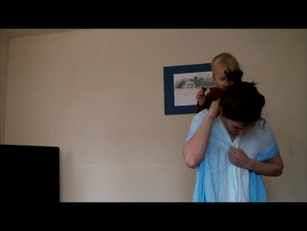
DH Shepherd's or Shepherd's Carry
This is my favorite shorty carry! Super comfy, and quick and easy. Shoulders can be capped, and the chest can also be spread if you prefer (I find it doesn't stay spread well on my smaller chest, though). For all DH-variation shorty carries, keep in mind that they may not be good for seat poppers, since there is no X under baby's bum to keep them in place, should they pop their seat.
This is my favorite shorty carry! Super comfy, and quick and easy. Shoulders can be capped, and the chest can also be spread if you prefer (I find it doesn't stay spread well on my smaller chest, though). For all DH-variation shorty carries, keep in mind that they may not be good for seat poppers, since there is no X under baby's bum to keep them in place, should they pop their seat.


 RSS Feed
